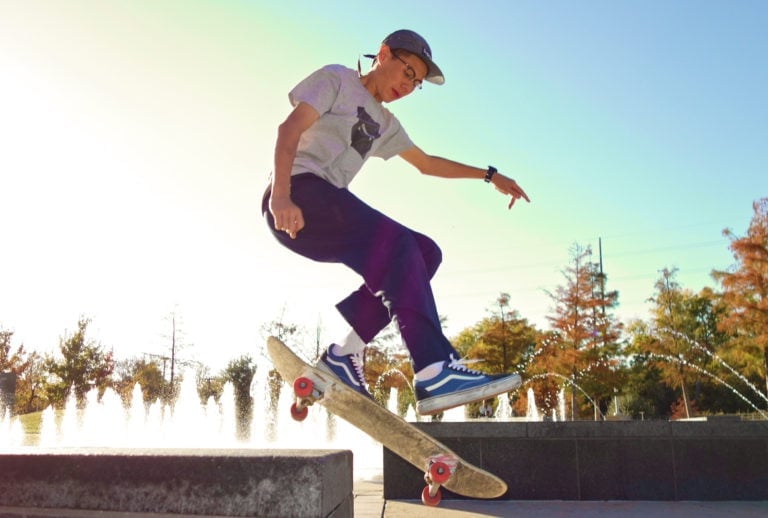
In this guide, we’ll teach you the crucial art of how to stop on a longboard. Whether you are looking to shave off a bit of speed or come to a complete stop, we’ve got you covered.
Why you MUST learn how to stop
After learning to ride and adequately balance on your longboard, learning to stop is the next most important skill to know.
Learning to stop will allow you to control your speed and will help keep you safe in almost all riding situations.
Being safe is essential as it means you can ride time and time again and not have to take time off because you’re injured.
I see many avoidable longboard injuries occur – broken bones, sprains, road rash, concussions, etc. All of this happens because a skater neglect to learn to control their speed.
Worse, a lot of these people end up giving up skating altogether.
You wouldn’t get in a car with no brakes, so why would you get on something you can’t control the speed of?
7 ways to stop on a longboard
The are a variety of different ways to stop on a longboard. Each has its ideal use case and skill level. Mastering all of them will make you a versatile longboarder.

1. Don’t go faster than you can handle
My first tip is NOT to go faster than you can handle.
If you don’t think you can make it down a hill without falling or manage to stop in time, don’t go down or allow yourself to gain too much speed.
It’s not the most exciting rule, but it’ll save you from some possibly severe injuries over time. Always abiding by this rule will allow you to stay out of all sorts of trouble. Simply skate within your limits.
2. Run it out
One of the easiest ways to stop on a longboard is to run it out or “bail.”
If you feel like you’re going too fast, you can simply run off your longboard, sprinting on the ground.
As you start to lose momentum, you’ll be able to stop. However, it is important that you continue your run and not just jump off as the sheer speed you’re going at will knock you over.
Cons of riding out
While running it out is easy and requires little to no technique, it is not a reliable and consistent way of stopping.
Not only will you have no control over where your board is going (it could be moving into traffic on its own), but it is also extremely hard to determine the point at which you have too much speed to keep up.
There are countless videos on the internet of skaters trying to run it out, but the board is simply moving too fast for them to keep up with the momentum and thus they end out with a rather uncomfortable faceplant.
With the board continuing to move at the same speed on its own, it’ll likely crash into something. You can only pray that it isn’t another person and that any damage caused will only be to your board. I’ve curbed and splintered more than a handful longboards this way.
Finally, you also need a considerable amount of space to allow yourself to run off the speed – It isn’t a viable way of slowing down in a tightly packed area.
Learning a more reliable and consistent way of controlling your speed is wiser.
3. Carving aggressively
Carving back and forth across the road allows you to shave off a bit of speed.
Carving aggressively works because it allows you to increase the distance you take down the road. If you’re aggressive enough, it makes your wheels “scrub” which is essentially a “micro-slide”, and the friction from your wheels scrubbing slows you down a bit.
Cons of carving aggressively
Most of the time, this method isn’t enough to bring you to a full stop.
And if you’re skating down a big hill, you may not be able to carve enough to slow down in a significant way. Finally, most longboards aren’t turny and stable enough to do this successfully at a significant speed.
In summary, this does work, and it can work at slower speeds, but it isn’t reliable at faster speeds or on steeper hills.
4. Stomping
Using your back foot, you stomp on the ground and lift your foot again multiple times in quick succession. Each stomp slows you down a little bit.
Most people that try to learn foot braking will start with the stomping variation as it is easier to learn. It’s a viable technique when you’re going at slow speeds and it doesn’t wear your shoes down as much as regular foot braking does.
Cons of stomping
The issue with stomping arises in its inconsistency. You can’t control your speed very well with it. Also, if you’re going fast, it is pretty much impossible to stomp.
Finally, it is pretty hard on your legs. After doing it even two or three times, you can really feel the impact on your calves. It’s hard to keep doing it for a whole session.
I don’t recommend stomping, but it’s okay if you have no other option. That said, I still use it to this day to come to a sudden stop at slower speeds – it’s useful in a pinch, especially in a busy city environment.
5. Foot braking – MUST LEARN
Foot braking is the most consistent and reliable method of controlling your speed and coming to a stop on your longboard.
I highly recommend everyone learn this method and take time to get to grips with it.
Some people will have a harder time than others, but it is worth the struggle. For the average skater, it will take more than a few sessions to learn it.
How to Footbrake in 5 Steps
You footbrake by bringing your back foot off the board, and placing it lightly on the ground heel first.
Doing this allows the sole of your shoe to grind against the ground, creating friction. In turn, the friction slows you down gradually.
Step 1 – Position your front foot

Bring your front foot slightly over the board’s center line, close to or over the front trucks.
You can have it directly over the center line or slightly skewed. Some people feel they have better control when their foot is skewed. You’ll have to play around with which you like best.
Finally, shift all of your weight over your front. Apply it as close to the middle of your front foot as possible will make balancing easier.
Step 2 – Bring your back foot to a parallel

With your rear foot deweighted, you can now comfortably bring it parallel to your front foot and hover it to the side.
Step 3 – Bend your board leg

Slowly bend your board leg to bring your hovering foot closer to the ground.
Surprisingly, this is the step that is most challenging for the majority of skaters.
Surprisingly, most longboarders will find this step to be the most challenging. It isn’t easy to confidently balance on a single leg while also bending it.
I recommend you practice this move 10-15 times daily off the board to build strength and balance in both legs.
The balancing bit normally develops over time the more you footbrake.
Step 4 – Drive your heel into the ground

As you bend your board leg, lower the other foot to the ground heel first. You want to do this as gently as possible and then gradually apply more pressure to get more braking force.
You must drive your heel into the ground, not your toes. If you go toes first, your foot may catch on the ground. This will could potentially send you off your longboard.
The most important piece of advice here is always to feel the movement. Only make minor, gradual adjustments in braking pressure as too heavy shifts in power may throw you off balance.
Step 5 – Bring your back foot to its starting point
Once you’re done slowing down as much as you want, gently lift your foot off the ground (heel last), place it back gently on the board and then shift your front foot back into a comfortable standing position.
Cons of foot braking
You tend to wear down your shoes quite a bit using foot braking. Most skate shoes constructed for the purpose last a while, but non-skate shoes get obliterated fairly quickly.
Some seasoned skaters use footbrake soles. These soles are made from rubber that you stick on the bottom of your actual shoe soles. This additional layer is easy to replace and lasts a long time.

Foot braking can also be time-consuming to learn. I know some skaters who never bothered learning it because they couldn’t put enough time aside. Some casual longboarders can’t be bothered with the daunting learning curve.
Finally, foot braking at faster speeds is hard and scary. So, if you’re bombing a hill or going super fast, have some other ways of slowing yourself and controlling your speed that you feel comfortable with.
6. Air braking
Similar to carving aggressively, air braking is a way to shave off a bit of speed.
It works by extending your arms out and making your aerodynamic profile as wide and as large as possible. This increases how much air is pushing against you (like a parachute), and it can slow you down a bit.

Cons of air braking
While air braking can slow you down a bit, the change in wind resistance is so subtle that it won’t be super noticeable unless you were in a speed tuck before.
It is only truly effective at faster speeds (> 30 MPH). It won’t bring you to a complete stop, it is only a tool to pick up less speed and slow you down slightly.
7. Sliding
Out of all the above methods, sliding requires the most skill. It is the most challenging braking method to learn and truthfully deserves an extensive guide of its own, but we will do our best to give you a brief overview of how it’s done.
Once you’ve conquered sliding, it is a highly reliable method for shedding speed. Downhill longboarders use it to slow down from as fast as 60 MPH in seconds.
If you consider yourself a casual skater, sliding isn’t a necessary skill. However, making it down a hill without foot braking is a great feeling.
Different types of sliding
There are different ways to slide and different names for each slide, but we will categorize them into two;
- stand-up slides
- hands-down slides

Stand-up slide (also known as powerslide) is when you make a slide without putting your hand (or any other body part) in contact with the ground.
Hands-down slide is when you anchor your hand in the ground (with slide gloves) while kicking the board out into a slide.
Hands-down slides are easier to master and more consistent to do, but they require slide gloves that’ll eventually wear down.
How to slide on a longboard
A slide is when you turn your board so hard that it makes your wheels break traction and slide across the pavement. This creates a lot of resistance as the wheels aren’t spinning around the trucks.
You maintain the slide by leaning back, placing your weight in the right places, and controlling the way the board rotates with your feet and body placement.
How to hands-down slide

Step 1 – Do a setup carve
To do a hands-down slide, you start with a setup carve. The setup carve is an aggressive carve that allows you to bring the wheels to their limit of traction.
It then becomes easy to push them into a slide. It also places your body in the optimal position to control the slide.
Step 2 – Place your hand on the ground
As you do your setup carve, you also place your hand on the ground. Which hand to use depends on whether you’re doing a toeside or heelside slide.
The specifics of doing a toeside or heelside slide differ, but they share similarities. We’re covering the similarities to give you a brief idea of how the slides work.
So as you come to the zenith of the setup carve, you start to push the back of the board out. This makes the rear wheels lose traction.
Step 3 – Distribute weight and position your hand
As you do the above, you need to ensure you have most of your weight on your front foot and that your hand on the ground is in line with your front truck or ahead of it.
You also want to shift a bit of weight (not the majority) to your hand to ensure it appropriately acts as a pivot point for the board to rotate around. This will allow you to control the slides more effectively.
Step 4 – Come back to the starting position
Once you’re done sliding as much as you want, you can release pressure on your back foot and allow the wheels to come back under you and regain traction.
You may want to bend your knees to absorb the lurch of the wheels hooking up.
How to do a stand-up slide

Step 1 – Do a setup carve
The stand-up slide starts with a setup carve as well. The setup carve will make completing the following step easier, as you can use the generated momentum in your direction change.
Step 2 – Kick your back leg out
At the setup carve’s zenith, you kick your back leg out. As you do this, you should have a lot of your weight on your front foot as this will allow the board to pivot/rotate around it.
You should also have most of your weight on your heels or toes, depending on whether you’re doing a heelside or a toeside slide.
Step 3 – Lean back
As you kick out the board, you should begin leaning back.
If you’re doing a heelside slide, you can imagine sitting back in an imaginary chair.
For a toeside, lean back (with a twisted torso, so your chest faces down towards the ground).
Leaning back allows you to drive weight into the board and control the slide much better. You’re going to want to lean a lot more than you imagine is necessary.
Step 4 – Control the slide
As you break into the slide, hang in there, maintaining pressure on your back leg and weight on your front leg until you’ve shaved as much speed as you’d like.
Keep your arms broad from your body to better maintain your balance.
Step 5 – Release the slide
To bring the board back into going straight, release the pressure on your back leg whilst maintaining your weight on your front leg. This will allow the board to rotate back into going straight.
As the board comes back to a forward position, bend your knees to absorb the lurch that occurs from regaining traction.
Cons of sliding
Sliding requires a lot of dedication to learn. It requires you to take time to learn these skills and ensure you are confident with them. There are many steps to each slide, and it takes months of constant repetition to turn them into a habit.
Sliding also requires specialist equipment. You will have to buy protective gear, slide gloves and maybe even change your whole longboarding setup to give yourself a proper learning platform.
Learning to slide is also quite dangerous, and you will most likely come away with cuts, bruises, and sprains in the process.
It also takes a long time before you can use them in casual skating situations like everyday riding.
We test every ride
Independent reviews, buying advice and the real test data behind them. Straight to your inbox.
Join 2,000+ riders
Wrapping it up
Hopefully, you’ve learned something about stopping or slowing down on a longboard. At the bare minimum, I think you should learn to footbrake. It is one of the most essential skills to have in your skill set, and it doesn’t take too much effort to learn.
If you wanna take things to the next level and do high-speed downhill riding, you’ll eventually have to learn sliding. While the above info doesn’t cover sliding into complete depth, it is an excellent starting point to get you dabbling with sliding.